You are using an insecure version of your web browser. Please update your browser!
Using an outdated browser makes your computer unsafe. For a safer, faster, more enjoyable user experience, please update your browser today or try a newer browser.

Tagged With: winter

Introducing Marble Painting Technique


One of my all-time favorite painting techniques with children is marble painting. I guarantee you are going to be surprised. I literally mean MARBLE painting. :) Again this is not messy, easy to prep and a smooth clean up. This is suitable for all ages and even older children enjoy this relaxing painting method. In addition this is a great exercise for the child’s eye-hand coordination and can boost the child’s patience, since it takes some skill to get the marble into the paint and then across the paper.
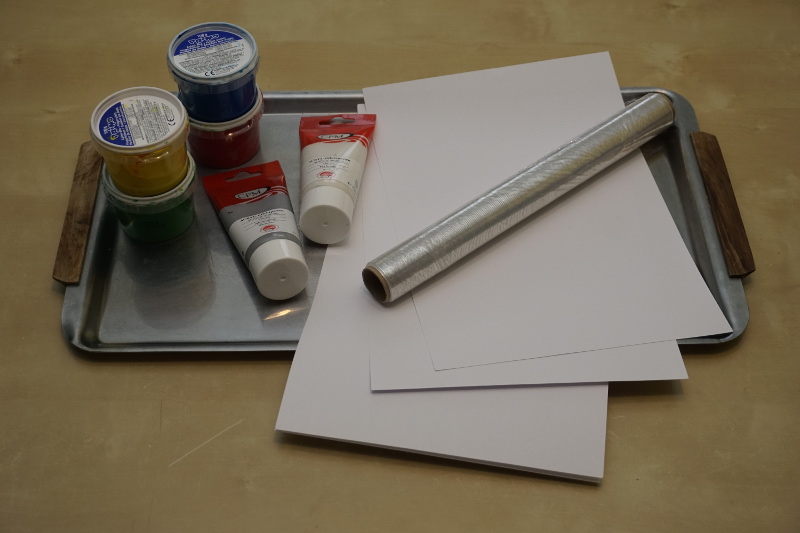
Needed items:

  • marble(s)
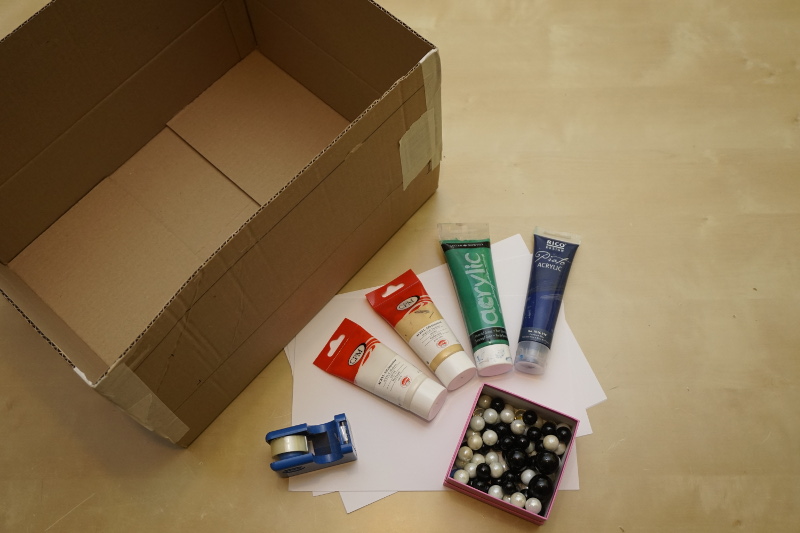
  • a box (high sides if possible)
  • paper
  • paint
  • tape


Step 1:
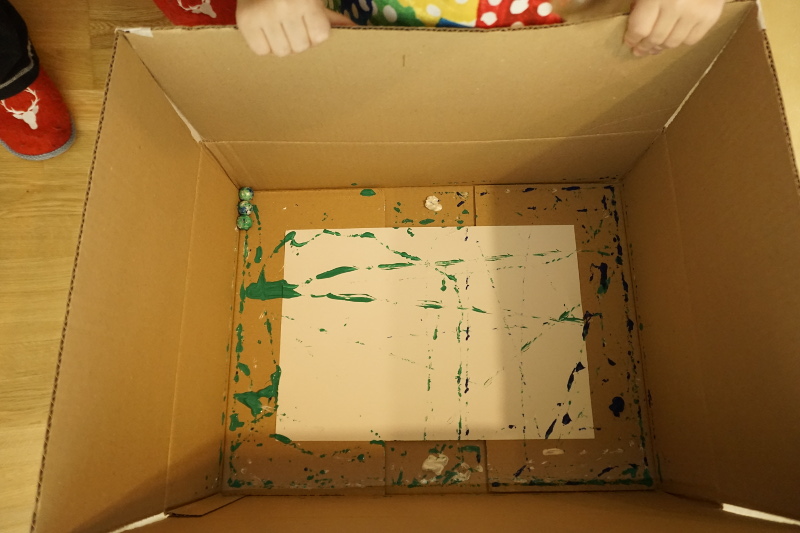
Find a box with high sides, that the marbles inside can’t accidentally jump out and cause a massive paint mess.

Step 2:
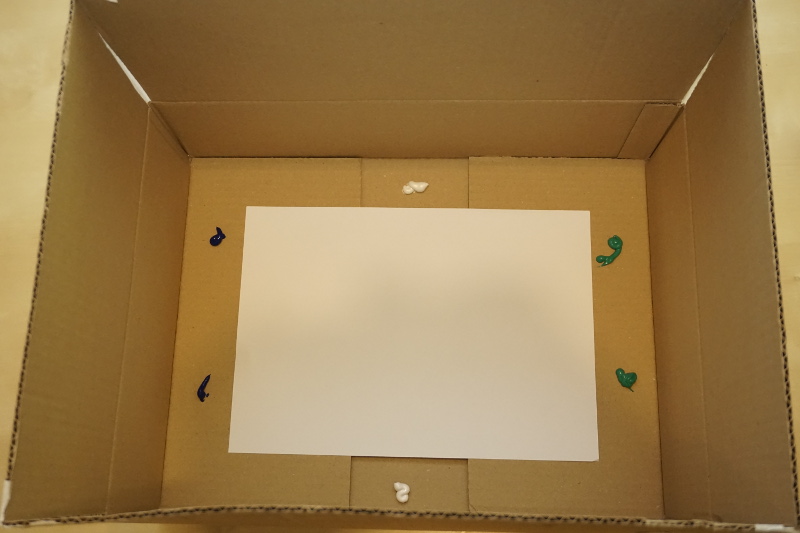
Put some tape rolls on the back of your piece of paper and then stick it in the middle of your box, so your paper doesn’t slide around in the box. Add a few drops of paint around your paper. I’d recommend no more than 2-3 different colors of paint.


Step 3:
Drop either one or more marbles into the box. Now pick the box up and move it all around – forwards and sideways, make sure you move the marbles into the paint and across your paper. The marbles will roll over the paper and make wonderful patterns in all directions.
If your child is quite young and getting frustrated, because the marble isn’t moving fast enough, I discovered you can also just place the box on the floor and then move it back and forwards causing the marble to bounce off the sides faster. The pattern is more of a zigzag but still very nice.


Step 4:
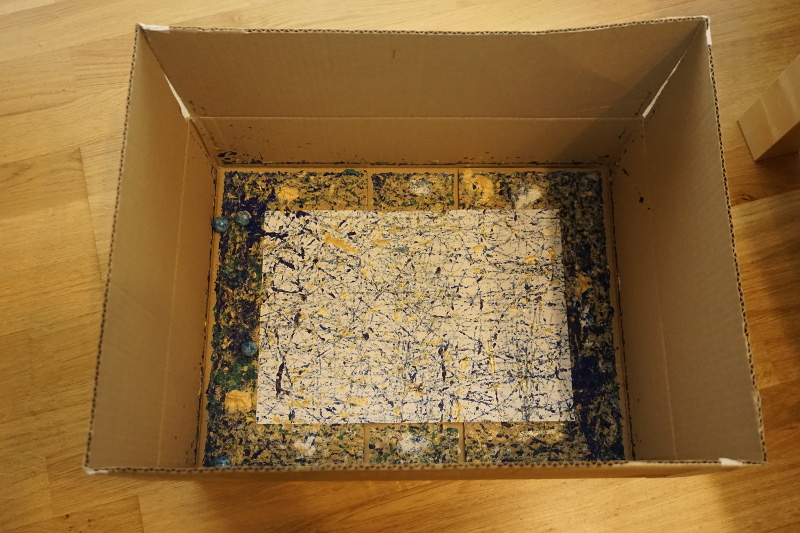
Do this whole process over and over adding new paper and paint in the box. You can use other colors than the first time, it might just mix a bit with the former paint, but the patterns and outcome will still be pretty and colorful.


Step 5:
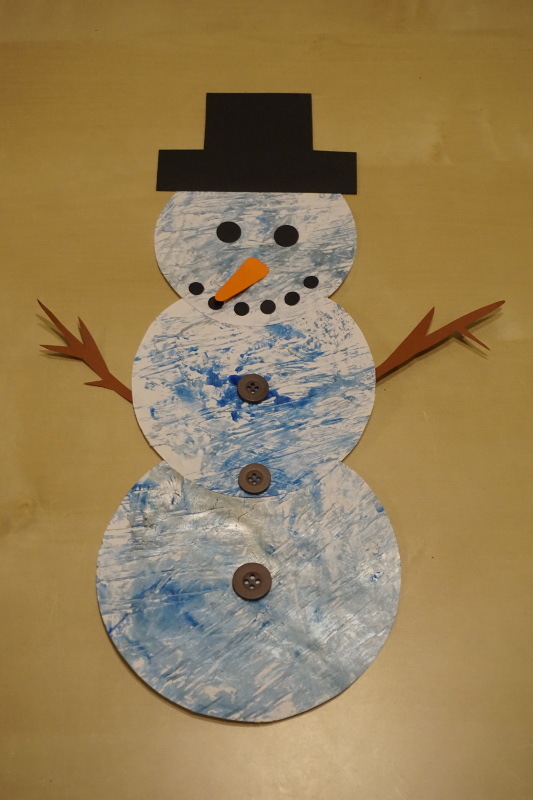
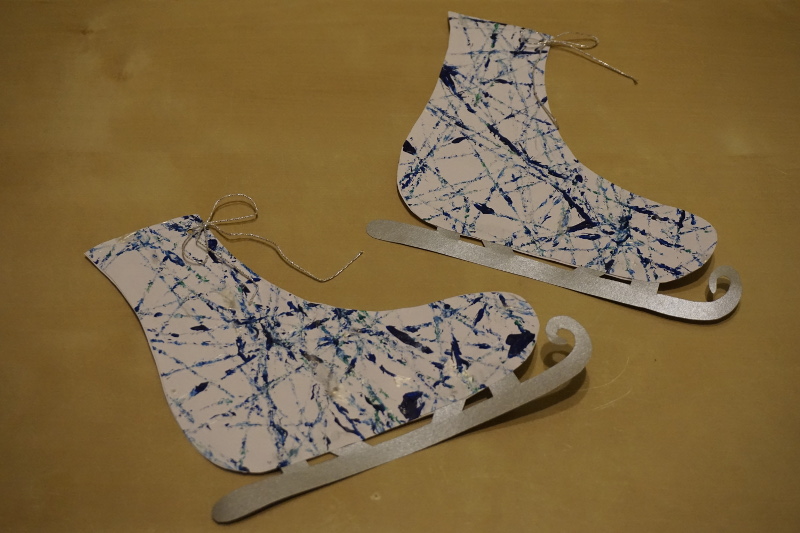
You now have created in very short time a whole bunch of beautifully decorated sheets of paper. You can use them for any craft you like. For example as a card, cut out a shape or in my case I made them into ice skates to hang on our windows as decorations. If you would like to make ice skates too, here is a template you are welcome to print out and use.

Happy crafting!


Categories: Painting Techniques | Tags: , , , | Leave a comment

Painting Technique: Plastic wrap print


Being a kindergarten teacher I come across loads of different painting techniques. I thought it might be helpful to share some of my favorites with you to either do yourself or make with your child on a rainy day.

What I love most about this first painting technique I want to introduce to you, is that most probably you will have everything you need at home and can do this any time you feel the need for some fun creative time or your child needs some entertainment or stimulating.

In addition this painting technique is an excellent sensory activity, it is relaxing and fun. It supports your sense of touch, creating patterns and promotes creativity. My daughter found great joy in just making lots of swirls, dipping her whole hand in paint and experimenting with the colors.

Another great pro to this technique is, it is not messy at all and cleaning up only takes a few moments.


Needed items:

  • plastic wrap
  • tray
  • paints
  • white paper
  • paper plate


any items you need to then create your craft (scissors, glue, colored paper…)


Step 1
Take the tray and wrap plastic wrap a few times around the whole thing, covering everything. Don’t worry about wrinkles in the plastic wrap. These give the print some nice structure, so the wrapping around doesn’t need to be perfect.


Step 2
I found the easiest approach to this painting technique was putting the colors you’d like to use on a paper plate, that way if they get mixed it doesn’t matter. Now you can begin. Dip your finger in the colors of your choice and paint patterns and pictures on the tray. Make sure you keep going and don’t take too long breaks, so the paint stays wet for the print.


Step 3
When you are satisfied with the amount of paint, the pattern or picture you drew on the tray, take your piece of paper and print it on the pattern you made. You just made your own picture print.
Now you can start over again and create as many different prints as you like.


Step 4 is optional
If you chose to make patterns instead of drawing a picture, you will have a bunch of papers with nice patterns printed on them. You could now use these papers as a base for a craft. My craft suggestion is a snowman, since it is winter here where I live.

If you’d like to make a similar snowman:
I cut out 3 circles sizes 14cm, 12cm and 10cm. Then I cut out a hat, carrot nose, arms and using a circle punch I made the eyes and mouth. For a special effect I chose real buttons to go on the body of the snowman.

Glue it all together and there you go, your snowman is done in no time!

Categories: Painting Techniques | Tags: , , , , , | Leave a comment