If you are looking for a quick last minute Easter craft then look no further…
Needed Items:
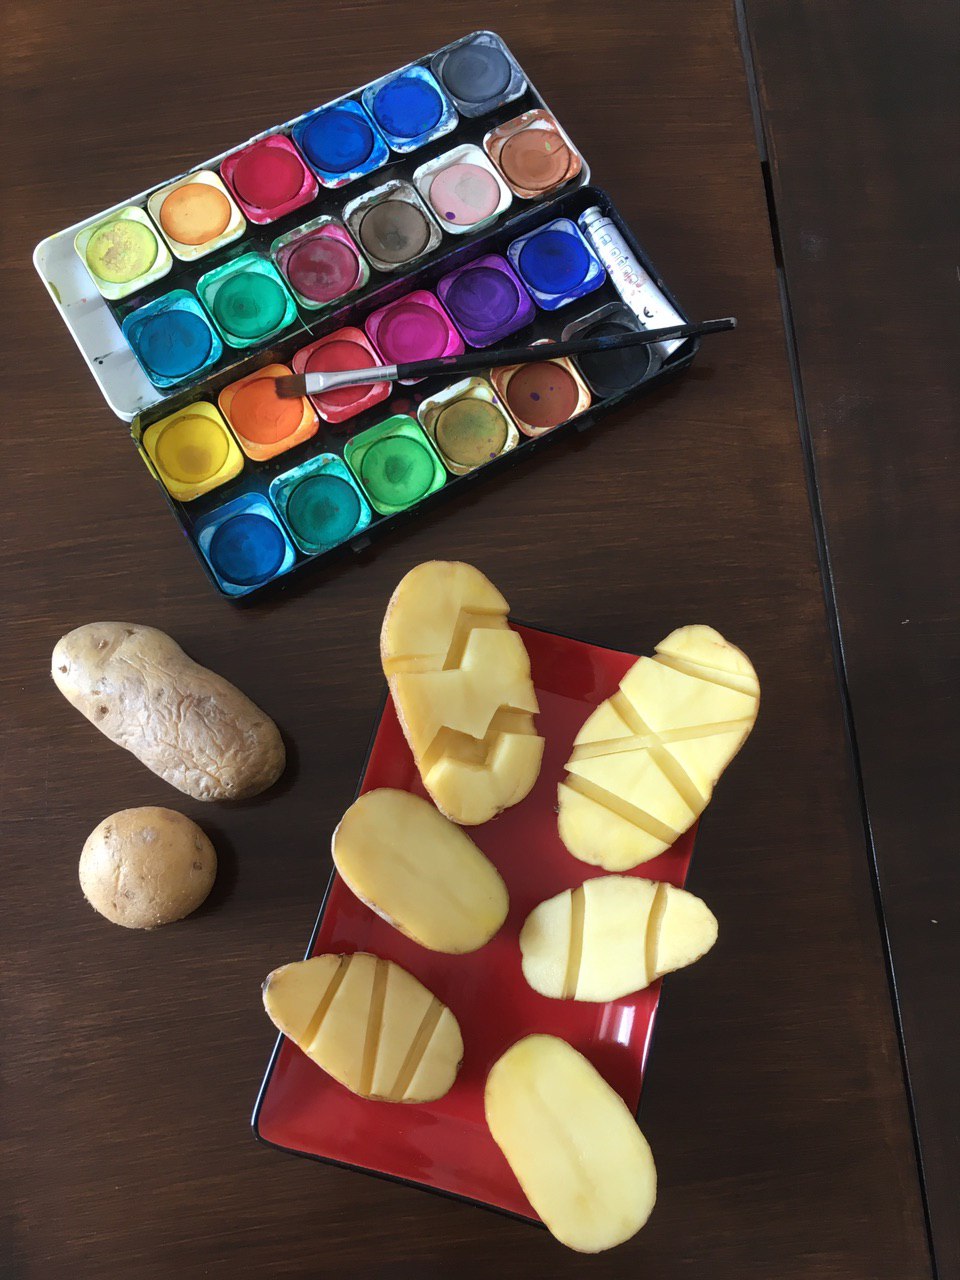
- Potatoes
- Vegetable knife
- Watercolors & Paintbrush
- Paper
Step 1:
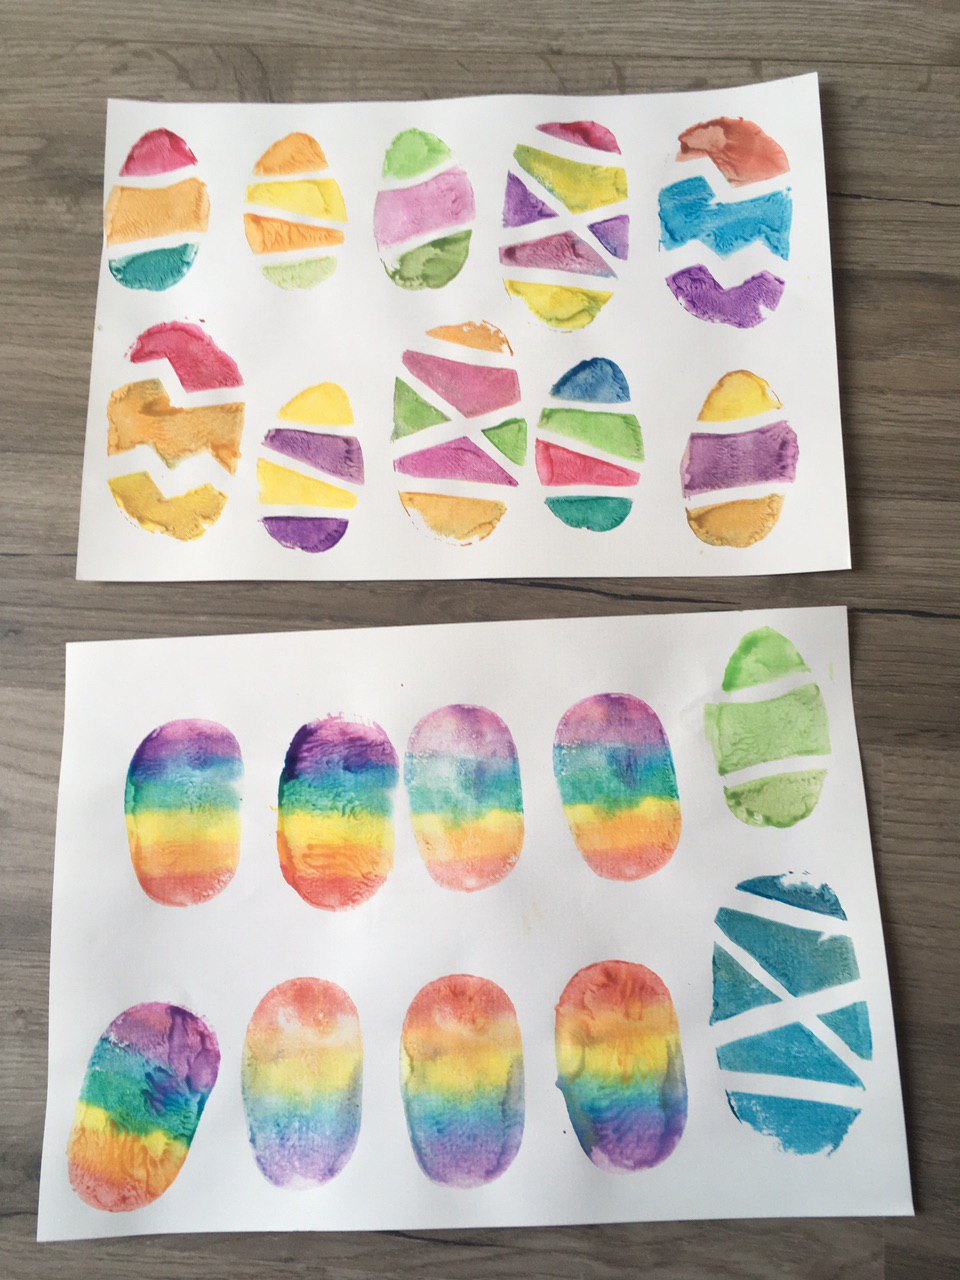
This craft is ideal for all ages and can be as simple or complex according to the child’s age.
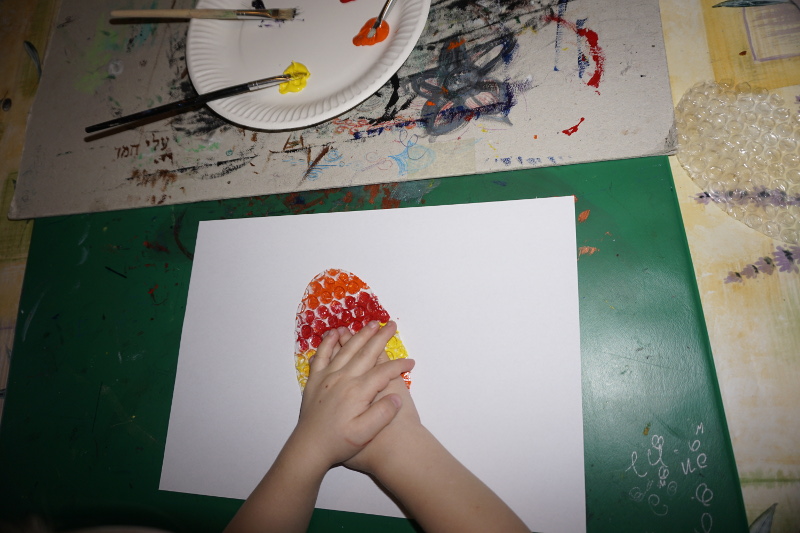
Prepare the potatoes by cutting them in half and then cutting about 5mm wide and deep trenches going across in all directions however you like creating a fun pattern.
Step 2:
Then your child, using watercolors and paintbrush, can paint the potatoes and print them on paper.
You can also leave a potato blank and your child can use their own individual ideas to create an Easter egg pattern of their own.
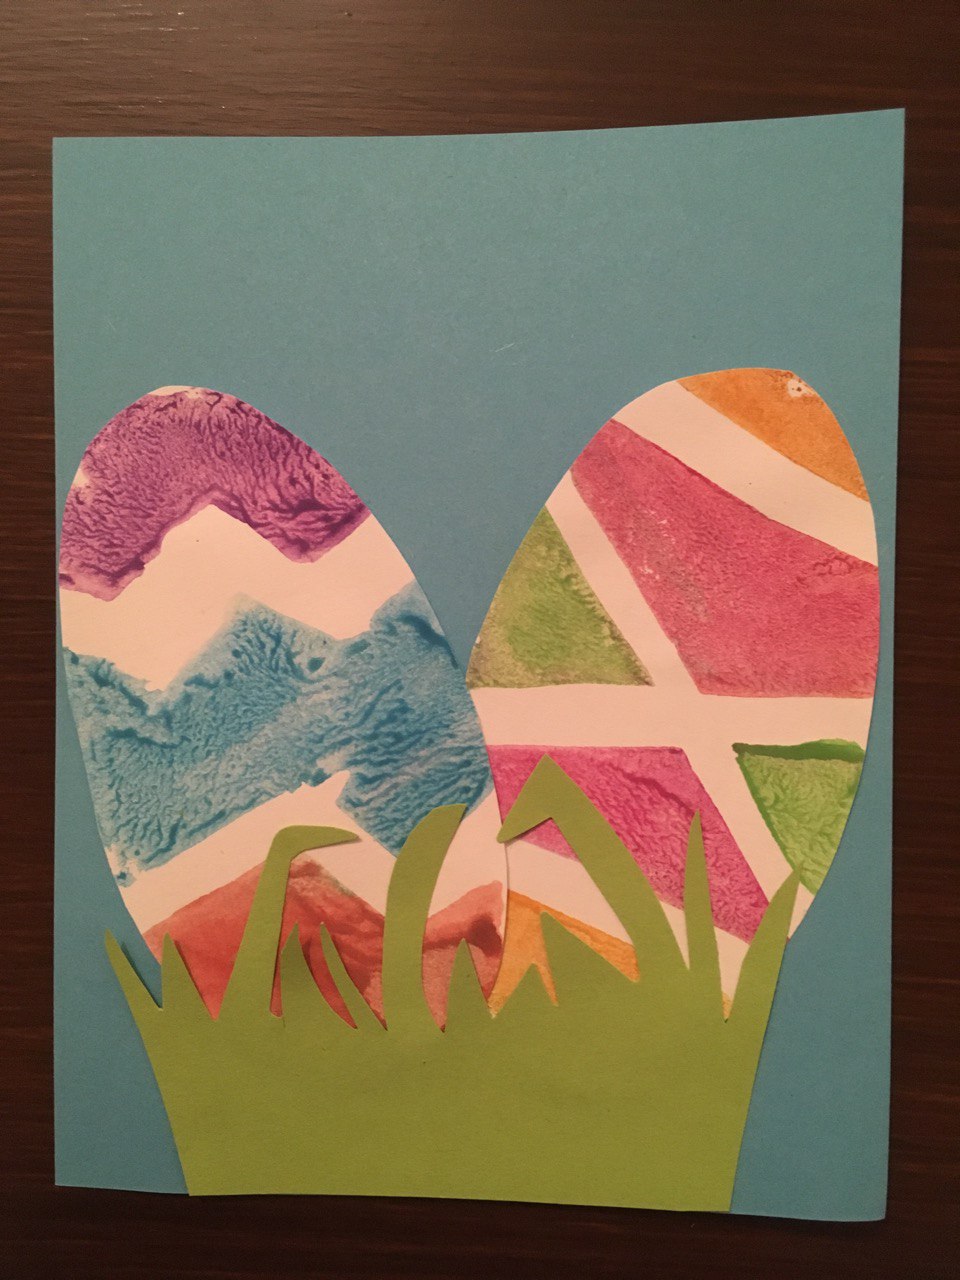
Step 3:
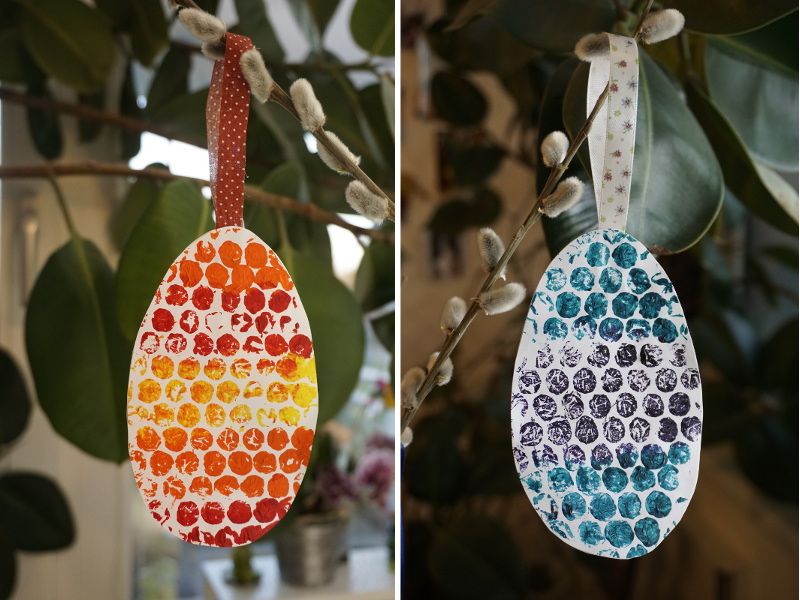
When dry these Easter eggs can be cut out and stuck on cards to create Easter cards to send to loved ones.
You can also cut two of the same size Easter eggs out and glue them together with a ribbon in-between and hang them up as Easter decoration.